


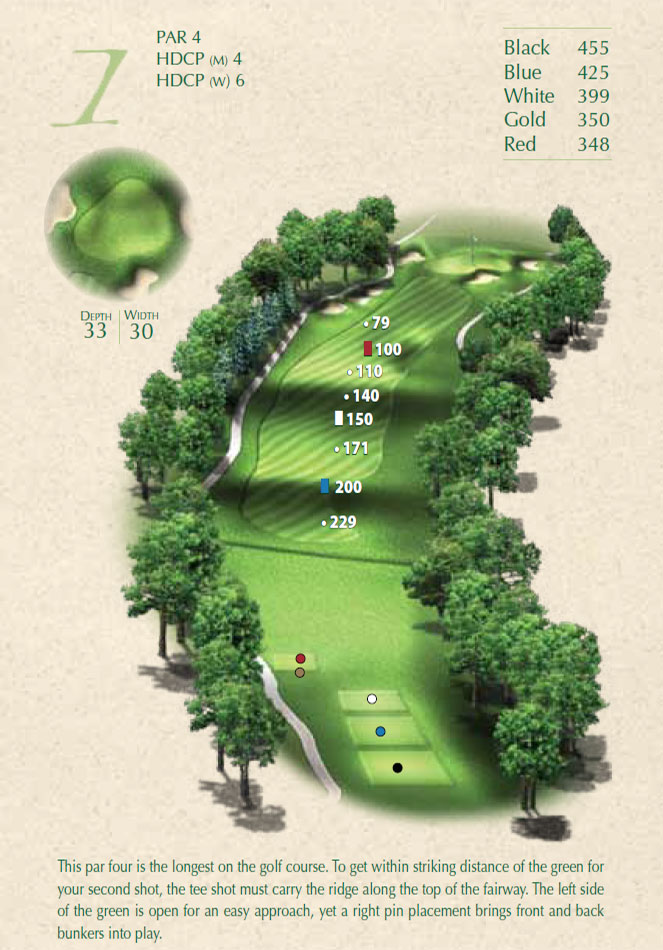
Hole 1
The first hole is a par four and the longest on the course. To get within striking distance of the green for your second shot, the tee shot must carry the ridge along the top of the fairway. The left side of the green is open, but the right pin placement brings front and back bunkers into play.


Hole 2
The second hole is a par five with a generous fairway that narrows as you approach the green. Avoid the bunkers to get a good shot. A humped front portion of the green makes the front pin placement difficult to access. The back-left third of the green is guarded by one of the four bunkers that surround the green.

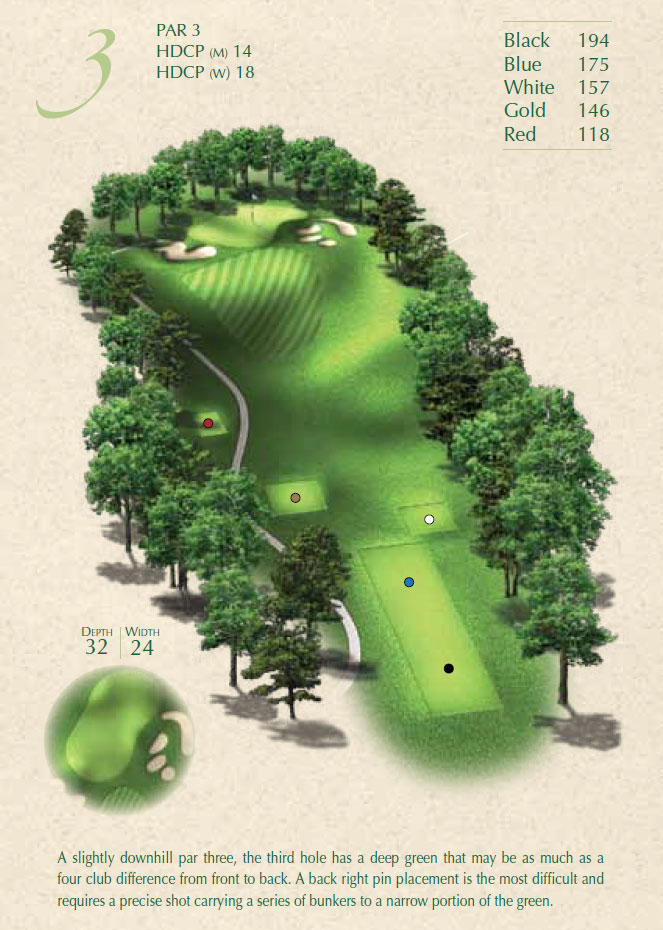
Hole 3
The third hole is slightly downhill par three with a deep green. The back pin requires precision to avoid the bunkers.

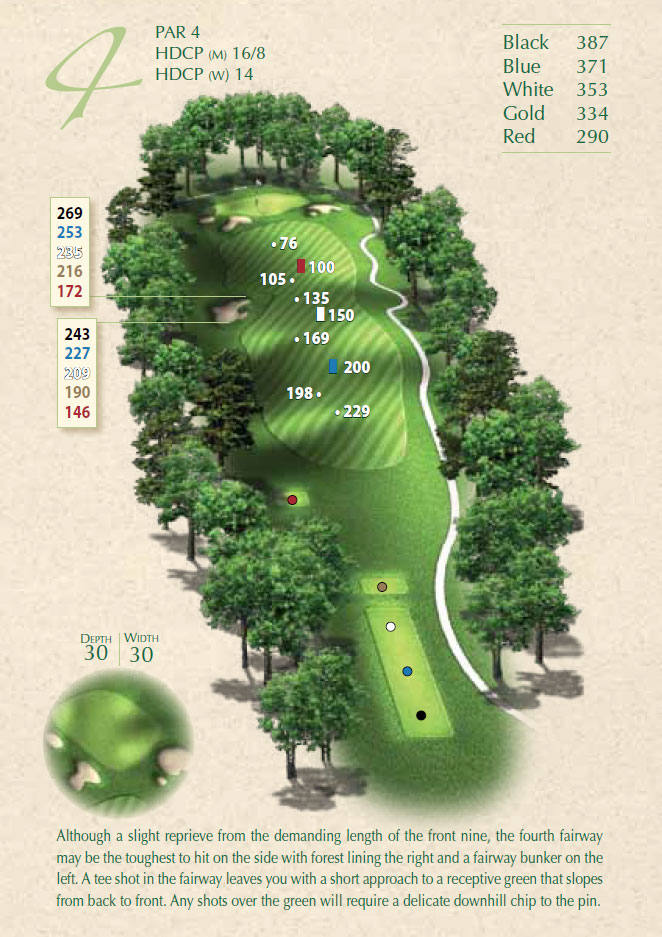
Hole 4
The fourth fairway is hard to hit with forest to the right and a bunker to the left. A tee shot in the fairway leaves you with a short approach to a receptive green that slopes from back to front. The slight downslope means any over shots will require a delicate hand.

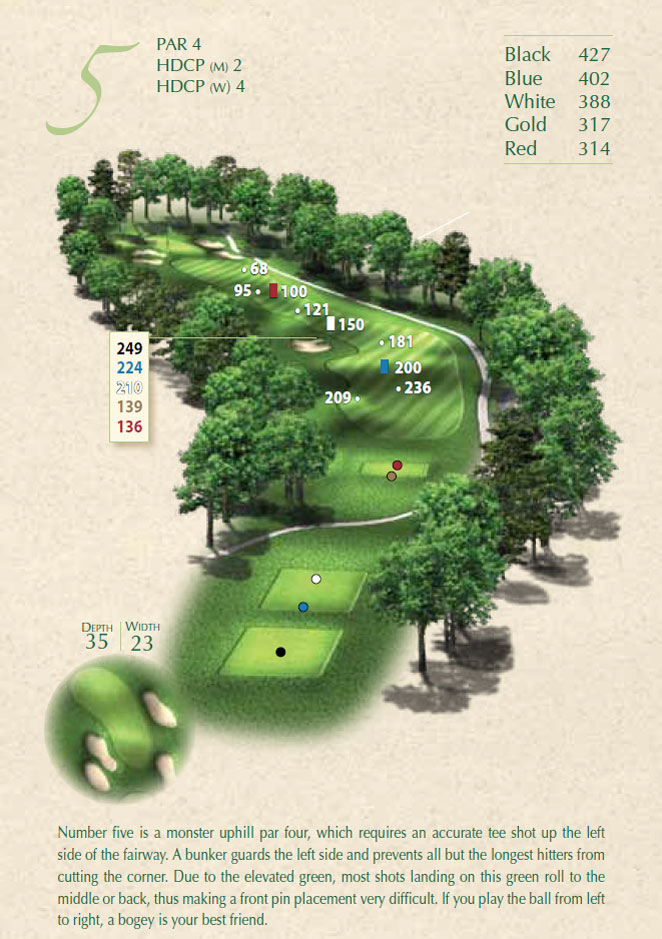
Hole 5
Number five is a steeply sloped uphill fairway which calls for an accurate tee shot up the left side of the fairway. A bunker to the left and an elevated green make this one of the most challenging holes on the course.

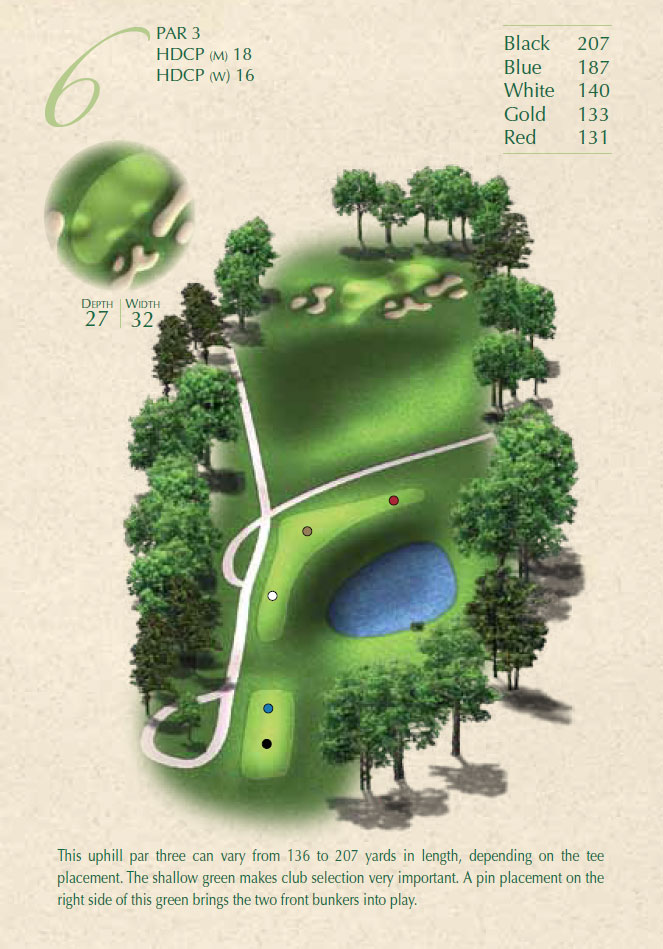
Hole 6
The sixth hole is an uphill par three with a shallow green. Pin placement is of particular importance on this fairway.


Hole 7
Fairway number seven is a par four that starts with a downhill tee shot. The bunker to the left is hard to see from the fairway, and traps many a good golfer.

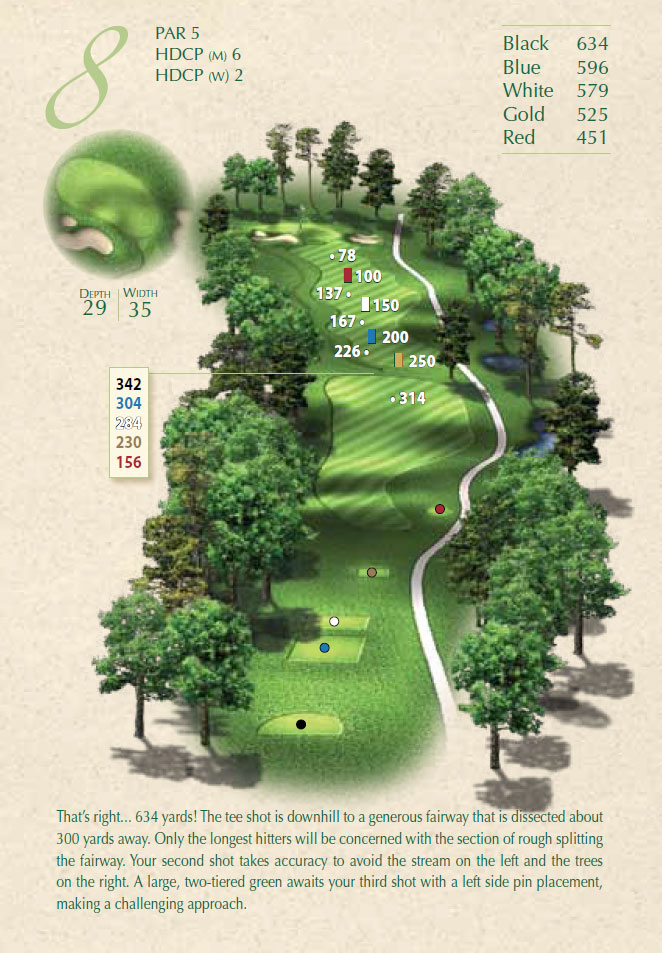
Hole 8
Number eight is a whopping 634 yards downhill with a two-tiered green. The tee shot is downhill to a generous fairway that is dissected about 300 yards away. Only the longest hitters will be concerned with the section of rough splitting the fairway. Accuracy is required to avoid the stream to the left and the trees to the right.

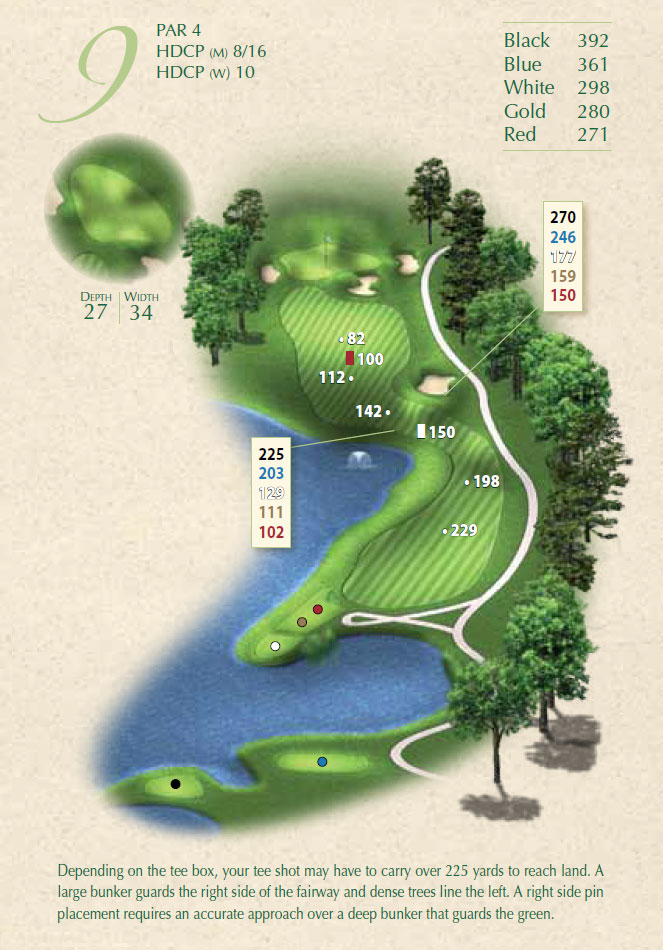
Hole 9
Fairway nine features a large bunker to the right and dense trees to the left. Depending on your tee box, your first shot may need to carry over 225 feet to reach land.

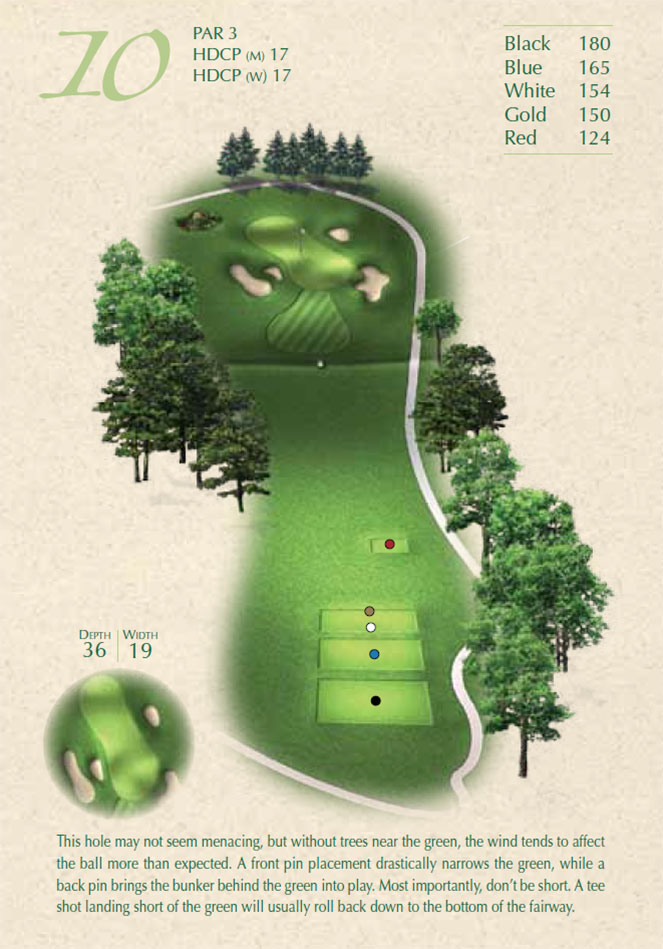
Hole 10
Hole ten might not seem menacing from the start, but, without trees to block the green, the wind can have a huge effect. A short tee shot could be the end, as they tend to roll back to the bottom of the fairway.

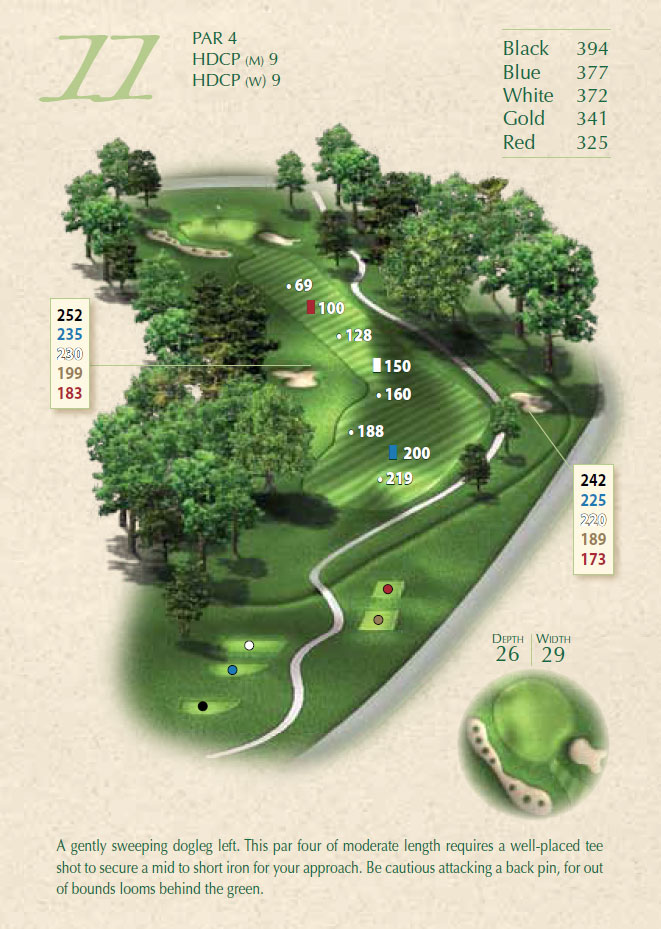
Hole 11
Number 11 is a moderately long par four fairway featuring a gently sweeping dogleg left.

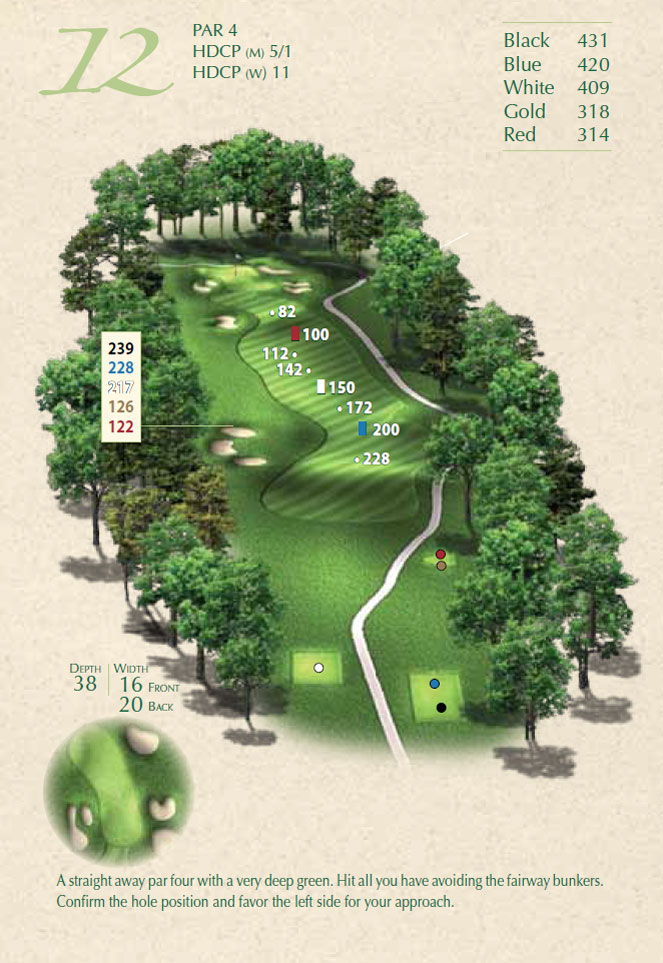
Hole 12
Hole Number 12 is a straightaway par four with a deep green. Be careful to avoid the fairway bunkers!

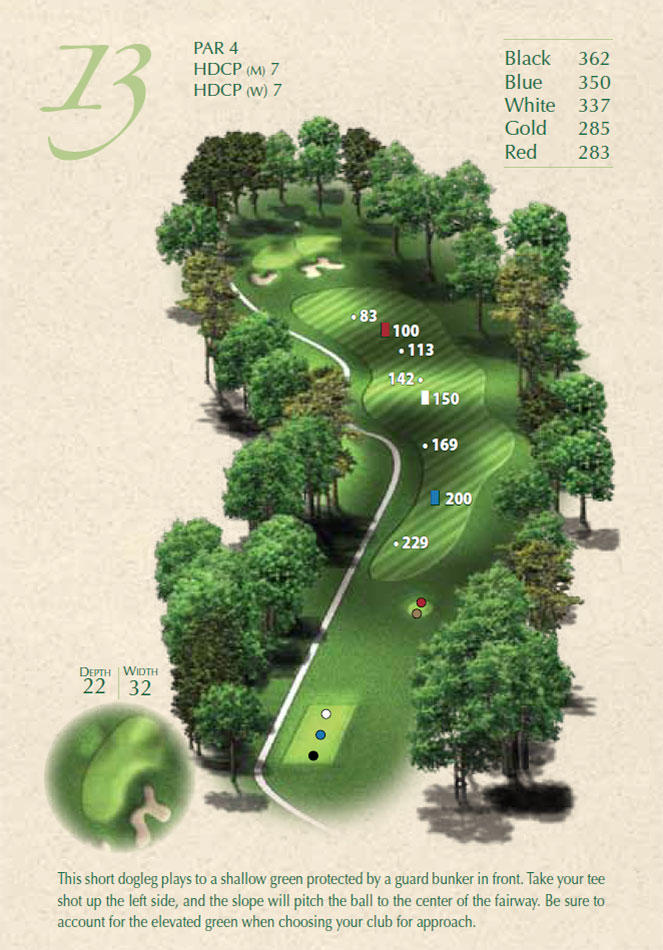
Hole 13
Fairway 13 is a shallow green protected by a guard bunker in the front. Be sure to account for the elevated green when choosing your club for this hole.

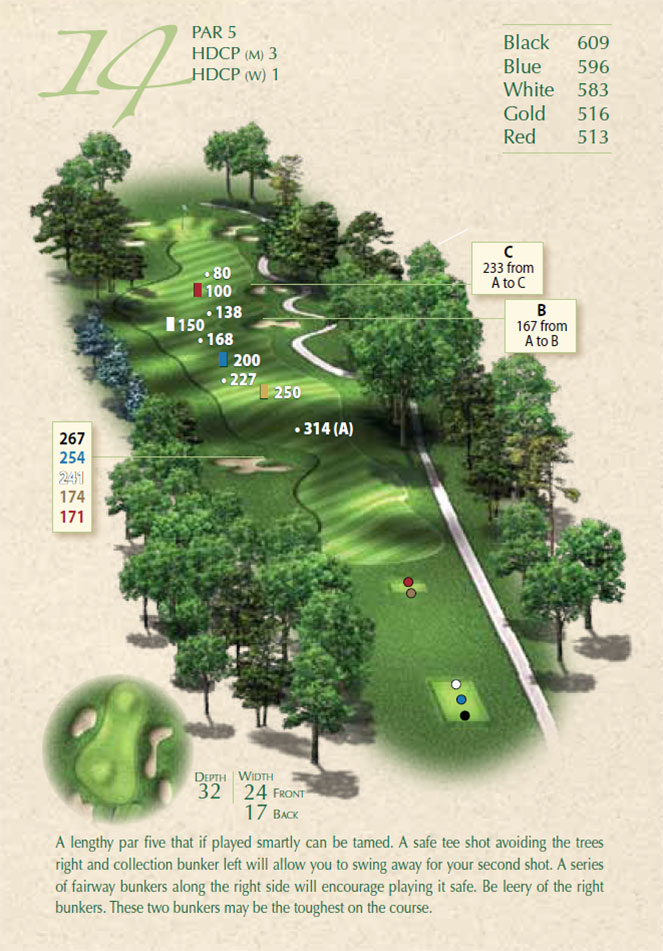
Hole 14
Hole 14 is a lengthy par five that requires smart play. A safe tee shot will avoid the trees; then a series of fairway bunkers along the right side will encourage playing it safe. Be leery of the right bunkers. These two bunkers may be the toughest on the course.

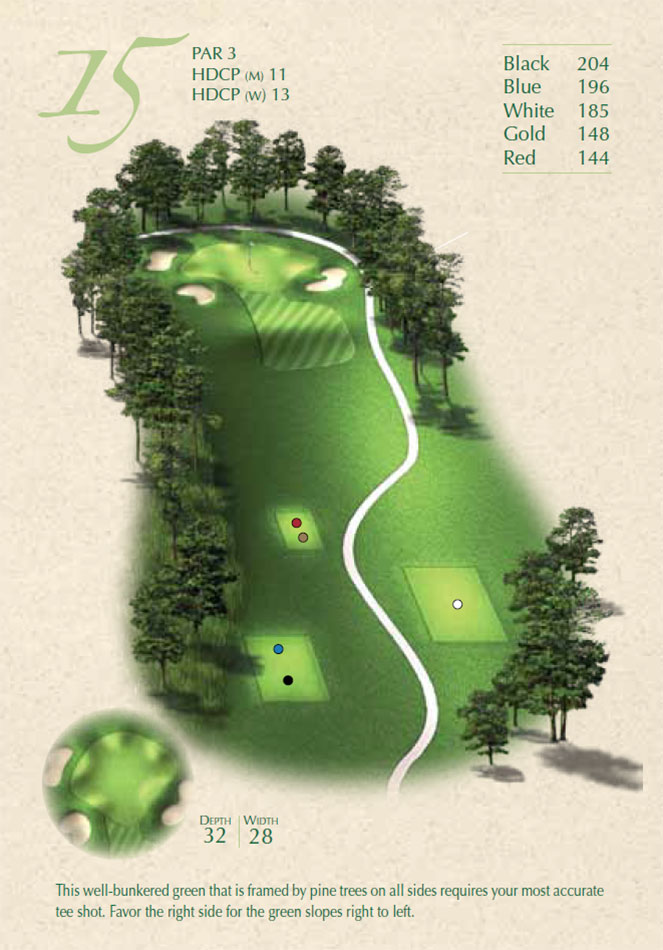
Hole 15
Number 15 is a well-bunkered green framed with pine trees on all sides. An accurate tee shot that favors the right is your best bet.

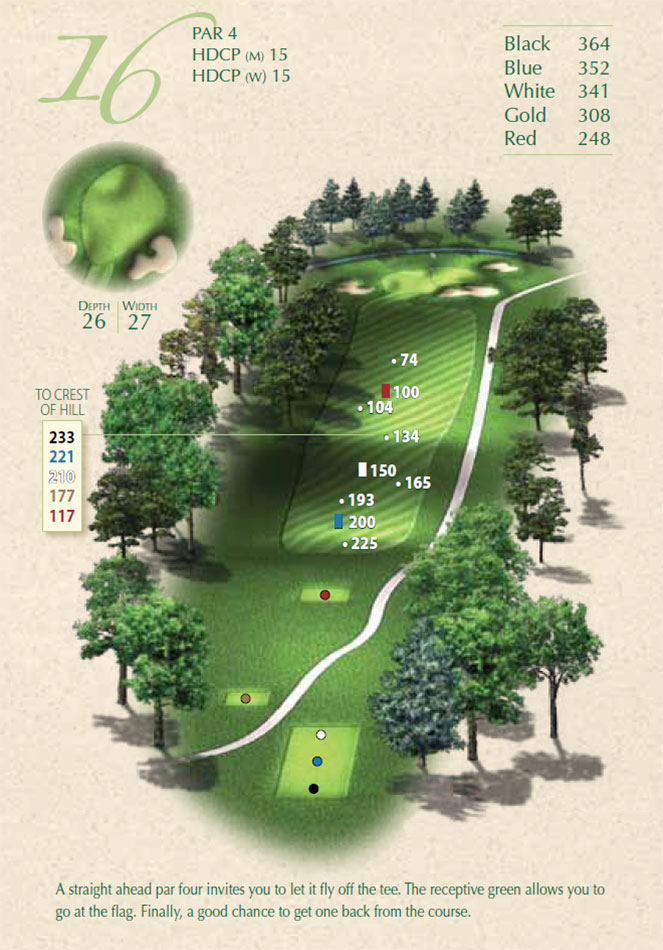
Hole 16
Hole number 16 is a straightahead par four with few surprises. Use this fairway to get back on course.

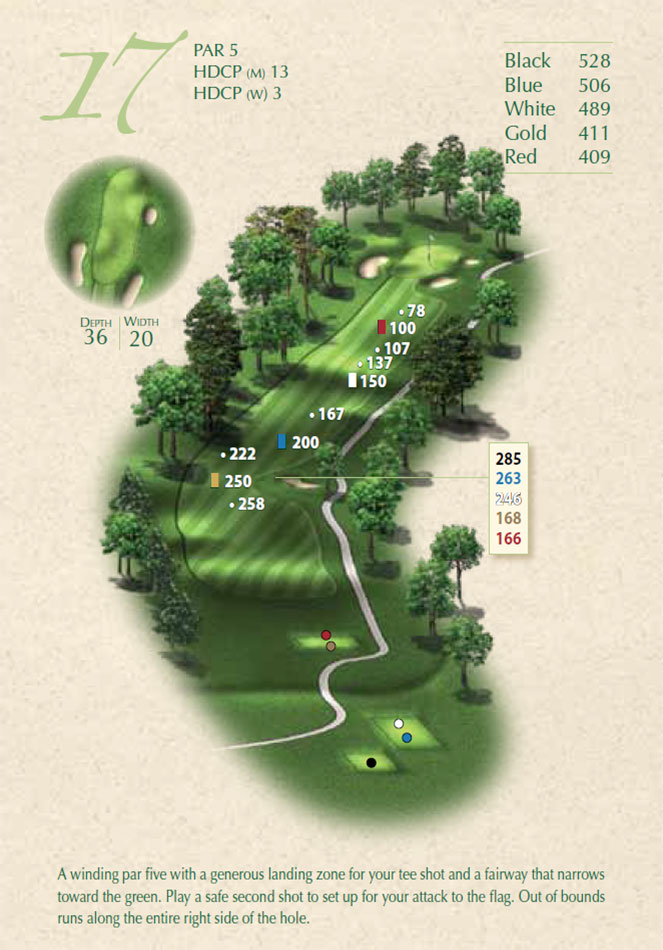
Hole 17
Number 17 is a winding par five with a large landing zone for a tee shot, but a narrow approach to the flag. Play a safe second shot to set up for your attack to the flag. Out of bounds runs along the entire right side of the hole.


Hole 18
Fairway number 18 is a slicer's night mare, featuring dogleg left kicks and large bunkers to the right. A short approach is your best bet – if you aren’t too proud.